The old microfarm; my love and my sorrow.

The one problem with gardening for me is that I start the year all gung-ho about growing vegetables, but yet by the time September rolls around I have a hard time dredging up the enthusiasm to finish what I have started; especially when I am not confident about what I will be getting.

It has been an odd year here in Duluth. June was almost as cold as April, and then July and August were way hotter than normal. All of the extremes are tough on plants and I just didn’t know what to expect.

We got some serious frosts recently when the weather went from 80s during the day (pretty warm for up here) one week to a series of nightly freezes and days topping out in the 40s and low 50s the next week. Although I covered everything the best I could, after three consecutive freezes it was time to bring in the tender plants. (I know I should have harvested them before the frost, but time has been at a premium lately).

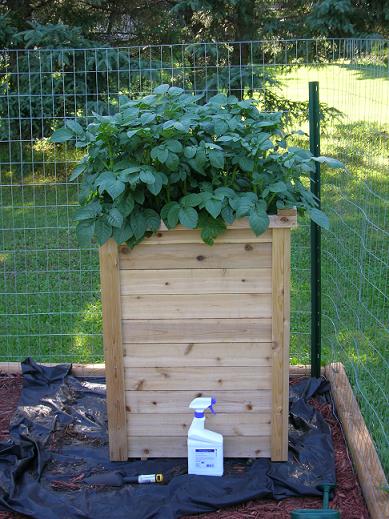
First the bad: The potato tower is a glorious failure. I forgot to report the results of last year’s harvest, but back then the tower only produced potatoes in the bottom 10 inches of soil (i.e. the same output you would expect hilling them traditionally). This year, using my homemade compost and filling in the dirt religiously, I have less potatoes by weight than the seed I planted in April (I think there was too much nitrogen in the compost). <sigh> I am done trying to grow potatoes in the tower; I will grow them in the ground like people have been doing for thousands of years. However, I think that the tower will make a decent tomato planter if I only fill it part way up and take out some of the boards. Besides, trying to keep up with compost production and the potatoes’ growth was more trouble that it was worth.

The good news it that I should have beans coming out of my ears if they dry properly. I grew pinto beans this year, and when the frosts hit about half of the pods were still green. In the past green pods have still matured and dried properly for me, albeit with smaller beans; we will see. By volume, however, I have double the pods of last years harvest. Last year I planted the plants 8″ apart, but that reduced the yield dramatically for all but the outermost plants. This year I put in two plants every 12″ in rows 18″ apart and used drip irrigation to keep the watering even. So even though I planted 40% less seed, I got double the yield. Pinto beans were probably not the best choice; next year I think I will grow Hidatsa shield figure beans again as they are a shorter season variety and still produce well.

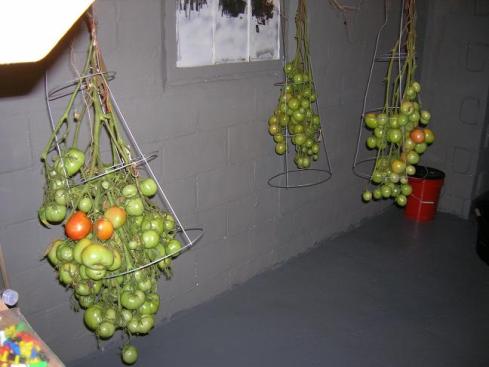
This year I also grew tomatoes for the first time. I had a lot of fruit on the vines, but when the frost/freeze warnings were posted they were all still green; I assumed that it was a lost cause. I was lamenting that fact to a customer of mine who had an interesting solution. For years she has been growing tomato plants by the hundred and she told me to pull the vines up by the roots, trim off the excess foliage, and hang them in my basement; she gets tomatoes until December that way.

Here you can see the tomatoes in my basement, and some of them are stating to ripen. If this works as well as she promises I will be doing it every year. The tomatoes are also supposed to mature more slowly, so rather than having them all ripen at once they might last over a longer period. At least there is less of a chance of frost in my basement.

Most of the rest of my plants are hardy and they are still out there in the garden: onions, carrots, parsnips, cabbage, and collar greens. I also grew broccoli, but with all the weather extremes I got just one little florette out of six plants. Next year I plan to rig shade cloth over the broccoli, cabbage, and collards to help keep them cool; we will see if that helps.

At least I have something to show for my hard work, but I am glad I still have my day job.

Ah, the noble condom.

It has been the faithful companion of men around the world for hundreds of years for its labeled purpose, and we have been finding alternative uses for them since they started making them out of latex (they were, and still are often made from sheep intestines).

One old school use of condoms is as a waterproof or dirt-proof container. Back in WWII it was common for sailors, especially those on the extremely vulnerable liberty ships, to put their valuables in a condom and tie off the end. If they were torpedoed (an all too common occurrence) and they had to abandon ship, it would keep their stuff dry. And at least since Desert Storm (and probably long before) soldiers and marines have often tied a condom over the end of their M16s to keep the sand out of the barrel. As long as whatever you want to keep dry is not too large or sharp, condoms can make a cheap and effective protective case.

I have heard of some people using condoms as fishing bobbers. I suppose that if you inflated the condom especially large you could use it for jugging (where you tie a baited line to an empty jug and throw it out into a lake), but you would probably want to put the condom in a bag or net rather than to tie the line directly to it; a big fish might rip it through tugging.

The elastic properties of condoms can allow them to serve as rubber bands. I am not sure how effective of a sling shot could be made with a condom, but you could probably make a decent polespear with it. It can also serve as an emergency tourniquet or can be used to secure a field dressing.

There has also been a lot of talk lately about starting fires with condoms full of water. I have tried to do this, but have been unsuccessful so far. However, this link will show the video of someone who knows how to make it work.

However, the most popular and practical use of condoms in the wilderness is as a water carrier. I was not always a big fan of condoms for holding water, but the fact is that no other container takes up less space in a pack or kit and can hold as much water as a condom. Some people have filled their condoms with a gallon or more of water, but it will last longer if you limit it to a quart or two. I have also learned a few tricks to make them more effective water carriers.

First, common logic would seem to dictate that non-lubricated condoms would be the preferred choice, but I have heard some good arguments for lubricated condoms. Condoms will dry out over time which will cause them to break more readily (hence the expiration date on the package); I have tried using some expired condoms as water carriers for a test, and they are quite a bit more fragile than new ones. In theory, lubricant should slow the drying of the latex. Also, the heavy duty lubricated condoms seem to be thicker, and hence stronger, than non-lubricated condoms which usually only come in one strength. As long as the lubricant is water based, it will rinse off the condom pretty easily. However, washing the condom is only practical where there is a lot of water available; if you were in the desert where water is more scarce, a non-lubricated condom would probably still be more practical.

Next, always inflate the condom several times to stretch it out. Obviously don’t over inflate it until it pops, but blowing it up like a balloon a few times will make it much easier to fill with water.

The trickiest issue with condom is how to seal them up while still making them accessible to drink from. Undoing a latex knot is maddening at best, so many, if not most people who carry condoms in their kits also include a twist tie. But there is an even better way…

I ran across this video a while ago which explains how to make a spout out of an elderberry branch (elderberry has a pithy core which is easy to dig out and make a tube with). It is pretty slick, but what if you don’t have elderberry or an equivalent pith cored wood to work with? There is another way:

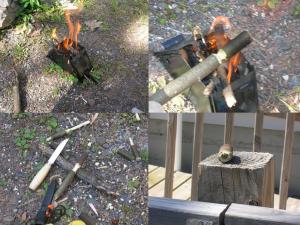
The stages of twisting a spout out of green wood

I learned a trick from this video. The idea is that if you heat a green stick over a fire the heat and steam will allow you to twist out the core, leaving you a hollow tube. If you can build a fire and have a knife or other tool that will carve wood, you can make a spout. You will want a green tree branch at least an inch in diameter, and as straight as possible. As you can see in my pictures, you want to carve a notch about 1/2 of the way to the center of the stick all the way around and three inches or so down from the end. You then heat the stick over the fire, turning constantly as you don’t want to burn it. Once you hear the moisture in it start to hiss, and you can begin twisting the stick. This part takes some practice. You want to twist it hard enough to separate the core, but if you twist too much before the stick is heated enough, you will just snap the core. What I did was to twist it as far as possible to put the core under tension, and then would put it back over the fire for a while longer; twist, heat, twist, heat, and so on until the core breaks free. You also want to carve in as deep as I said, because if you go too shallow, the outside of the stick will split while you are twisting. This is definitely something you want to practice around the campfire a few times. If you are successful, you will have a tube.

Carve your notch and sand it smooth with a rock

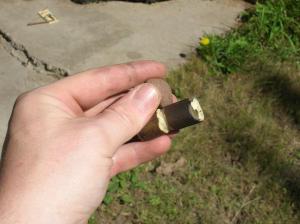
There will be a bunch of loose fibers in the spout, but pushing a twig through it a few times will get rid of most of those. Carve a notch around the spout to be able to tie the condom to; just make sure you don’t go too deep. At this point, it is a good idea to take a rough pebble to sand everything a smooth as possible. You do not want any splinters to rip the condom. Once the spout is completed, carve a simple plug to use as a cork. Then it is just a matter of securely tying the condom to the spout:

It was raining out, so I just filled this in the sink quick. This is just to show you what it looks like; always use a sock or bandana to support the condom.

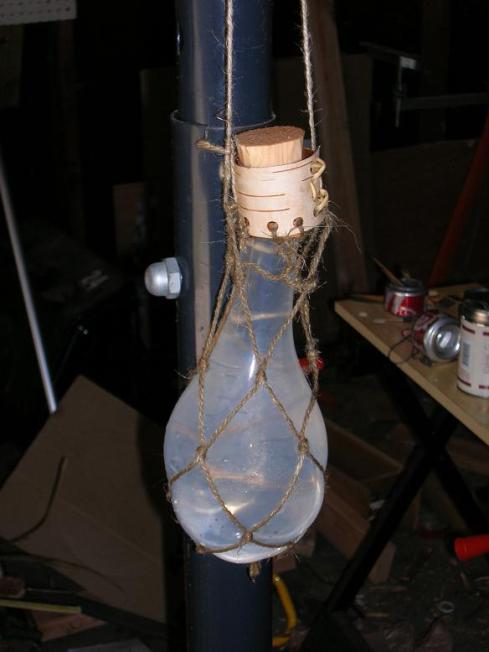
I also decided to try making a full abo-style condom canteen:

With a birch bark neck and a netted body, I think this looks pretty cool. I don't know how practical this is, but I think Cody Lundin would be proud.

If you want to see the steps to making the neck, click here.

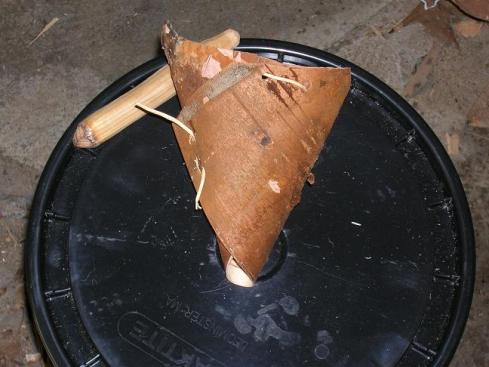
The last major issue is filling the condom. If you have a waterfall it is pretty easy, but what about lakes and streams? If you live in birch country, it is no problem. Make a simple funnel-shaped scoop out of birch bark with the exit hole slightly smaller than your condom or flask mouth:

A simple cone of birch bark can do wonders. I pegged it together with spruce root, but even twigs would work.

Just hold the funnel tightly to the condom/flask and scoop.

The funnel will leak, but you will still have enough water pressure to do the job. You mught have to squeeze the water down a few times (like milking a cow), but it should fill pretty easily.

That is enough stuff for now. As always it is best to practice this stuff at home. I do admit, it is quite entertaining to go to the drugstore and tell the clerk, “well, I worked my way through the last six I bought; better give me an even dozen this time.” And what brand to buy? I like Durex; after all, the Trojans did lose the war against the Greeks.

Until next time.

I want to tell you a story about an experience that I had when I was 14 years old. This a memory that is still quite vivid even after 16 years. I am talking about the time I had an encounter with Bigfoot.

I was inspired to write after watching a bunch of Monsterquest episodes on Netflix. For anyone that hasn’t seen the show, the premise is that they go out to search for legendary creatures using the best technology that their budget allows. After 50 minutes of suspenseful music we find out that they didn’t actually find what they were looking for (except for the giant squid; that was pretty cool), but that there is evidence that it still could be out there. What we end up with at the end of each show are people who really believe that they saw what they saw and skeptics who do not think that the existence of these creatures is possible.

I am a casual believer in Bigfoot (or Sasquatch to the PC crowd) based on my one experience in the Boundary Waters as a kid. Here is my story:

When I was 14, my school had us go on a fall canoe trip into the BWCAW. At this time in my life I was not very fond of canoeing, but it was fun to be out with friends in the woods. It had been a cold morning on the day of the return trip, and I had put on several layers of warm clothing which was rapidly becoming uncomfortable as the sun heated the portages. We were on quite a long portage and my friend Mike and I had run ahead of the others who were carrying 70’s era Grumman canoes. Those old aluminum tankers will slow anyone down, and we were planning to drop our packs at the far end of the portage and go back to help the others.

When we got to the end, Mike went back to the group while I decided to stop and remove those warm clothes. Anyone who has taken off layers, fumbled with the straps on a an old canvas Duluth pack, opened the waterproof liner, reloaded the pack, and closed it up again knows that it can be quite a process. Probably four or five minutes later I started heading back.

I had only been hiking for a minute or two when I saw something cross the trail about 100 yards ahead. The point of the trail where it crossed made a bend to the left, but it crossed silently to the right and into the forest. As I visualize the image in my mind, I still feel the hair rising on my neck. It looked for all the world like the dark silhouette of a chimpanzee walking on two legs with its long arms swinging. It didn’t look at me that I could see, it just crossed the trail and disappeared into the brush.

Being 14 I wasn’t thinking about Bigfoot, I thought that Mike was hiding in the bushes to jump out and scare me. I crept quietly to the point where I saw the creature cross the trail, but it was long gone. At that point I got pretty wierded out by the situation and double-timed it back to the group. Mike had already been back there for quite a while, and swore that he never crossed the trail in front of me (and either way, if it was him, he could not have beat me back to the group if he had wandered into the brush).

I have tried to piece together the location of my sighting from memory, and the best I figure is that it is within a 2 to 3 portage radius of West Bearskin Lake (we were based out of Camp Menogyn on that lake), but I don’t know for sure what our route was. I have been in the area several times since then, but I have never seen it again.

Before anyone tells me that what I saw was a bear, I know what a bear looks like. I have seen black bears in the woods; I have seen them on roadsides; I have fed them in animal parks; I know what a bear looks like. This was not a bear. It did not have the silhouette of a bear. I am not saying that I saw a Bigfoot for sure and for certain, but I know that I did not see a bear.

What I do know is that my encounter has added another layer of spice and mystery to the forest for me. I tend to be coldly logical at times, but living in a world without some mystery would be pretty boring. I hope that they never prove or disprove the existence of Bigfoot. We need a few legends just to stay legends, if only to scare our friends with around the campfire.

Pizza on a campfire. No fuss, no muss, no dishes

Who doesn’t love pizza? And who doesn’t think cooking caveman style on a fire is bad ass? I think they are both awesome, and I wanted to combine the two into something extraordinary.

There are lots of campfire pizza recipes out there, but most seem to be built around pita bread, English muffins, or tortillas. Don’t get me wrong, I love Mexican food (or what passes for Mexican food in Duluth, Minnesota), but a tortilla is not a substitute for a pizza crust.

Field and Stream had a neat article a few years back that talked about some campfire cooking methods (I still have to try digging a bean hole one of these days), and I liked their concept of using aluminum foil as a reflector oven. Aluminum foil is inexpensive and weighs next to nothing, so why not try it out?

Here is my recipe:

  • 1 Campfire, the hotter the better
  • Heavy Duty Aluminum Foil, 18″ wide if you have it. Rig one piece as a pizza pan, and tear off another piece a bit over three feet long to make the reflector.
  • Bannock Dough. My basic bannock recipe is 1½ cups self rising flour, 1 tsp sugar or honey, 1 tbs oil (olive or peanut for me), and enough water to make a stiff dough (about ¾ cup). I mix the works up in a 1 quart plastic bag.
  • Pizza Sauce
  • Cheese
  • Anything else you want on your pizza. I used pepperoni, but I suppose I should have foraged for the toppings to make this more bushcrafty.

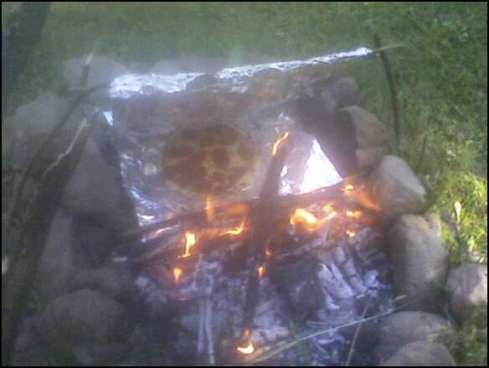
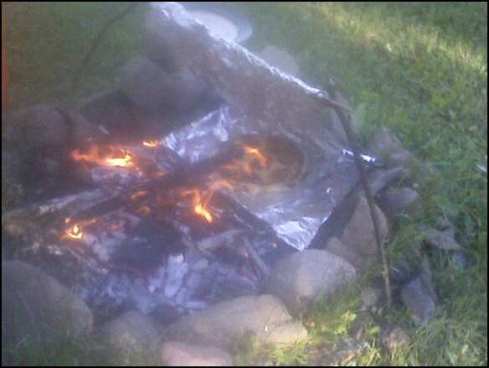
Not a great image, but you can see more or less how I put it together

Unfortunately I was using my camera phone which is not optimized for taking pictures (I have an old Samsung Juke which feels like using a telegraph compared to the new smart phones, but new phones cost new money), but you should be able to get the idea from the pictures.

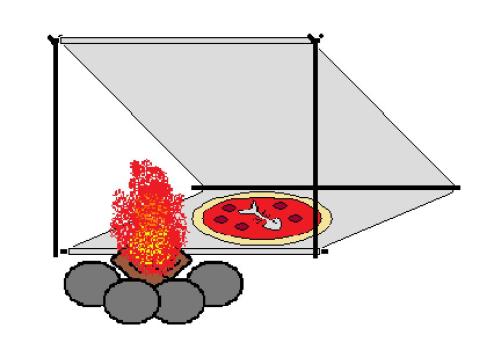
Roll each end of the foil around a straight, green stick. Anchor one of the ends right up next to the campfire and anchor another stick about a third of the way along the foil, away from the fire. Now fold the loose end of the foil towards the fire at a 45 degree angle and support it with two forked, green sticks. Better yet, look at the diagram:

You want a hot, hanging fire to do this; not coals. This simplifies cooking since hungry people do not like waiting for a fire to burn down.

On the foil pizza pan, dust the dough ball with flour and press it out like you would any other pizza crust. Lay on your sauce and toppings and put it in the reflector.  There are no set times; just keep rotating the pizza as it cooks to keep it even.

I thought the pizza turned out pretty good. It was a bit doughy in the middle; if I had a fire grate I would have stuck the pizza on top for a minute or two to brown the bottom. Either way, it worked pretty slick.

Until next time.

I realized the other day that most of my blog entries (when I remember that I have a blog) in the last year have been heavy on cooking and gardening, and light on bushcraft. So lets do some bushcraft…

I had the day off, and decided to make it a bush day. I had not been fly fishing since early July and ventured out to my favorite bass stream (and no, I will not tell you where it is; find your own). In addition, I had bought some new boots for grouse hunting (Irish Setter’s for 80 bucks on Amazon.com; how could I refuse?) that needed some breaking in, so I laced up the boots, grabbed the rod, and off I went.

A long story short, I didn’t get any fish. I had a northern check out my fly, but it took off before striking. I wasn’t surprised; I have never had much luck at this spot past July. The water gets to low, and today there were several hawks cruising the river (I don’t know if they were fish eating hawks, but I imagine to a fish a hawk is a hawk).

Fishing being a bust, I decided to check out the area right around the river to see what kind of useful stuff I could find. While still on the subject of fishing, there were some nice bait sources available:

Galls like this form on plants from insects laying their eggs
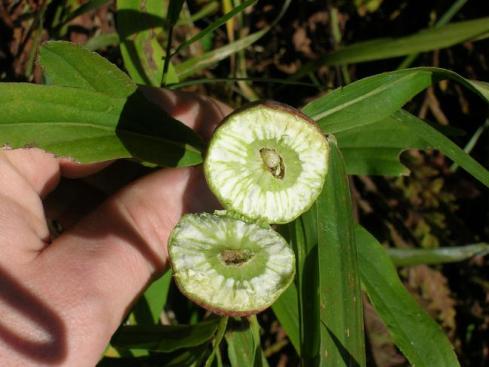
If you split them open, you can often find a grub to use for bait

I believe this is a green frog. If you are slow and quiet you can often catch them by hand. This guy let me touch his back without jumping away (I didn't pick him up; no point stressing him out). Frogs can make good fish bait too.

There was plenty of animal sign. Some beaver appear to live on the river. No dams, but a few old houses and plenty of chewed wood on the river bank(although that could have come from anywhere upstream). I found the wire and weight for a trapper’s drowning trap set, and it was heavy enough that I assume that beaver is the target. I found a lot of other stuff too:

There were lots of game trails like this leading to the river. (note: it is really hard to get a good photo of a game trail)

I think this is a mink track, but I am no expert. It definitely appears to be the track of some member of the weasel family. It was about an inch wide.
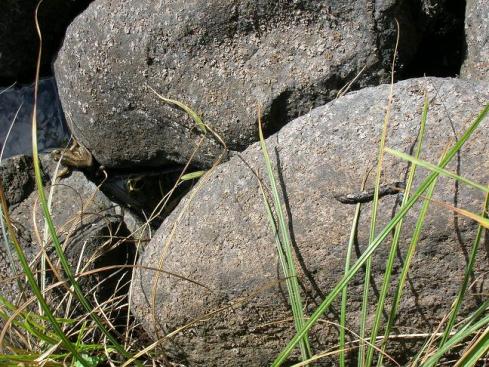
I think the scat also came from a mink. Note the green frog to the left; they were everywhere.
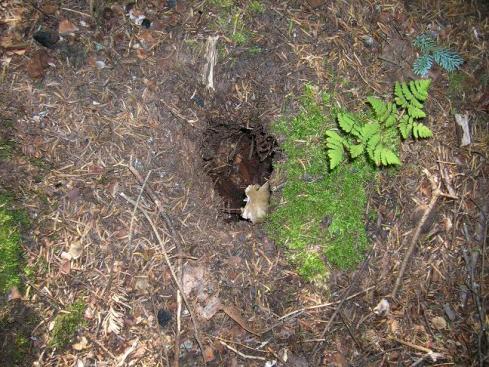
A burrow perhaps? There was a lot of squirrel sign around the hole. Would it be a good spot for a trap? Maybe.
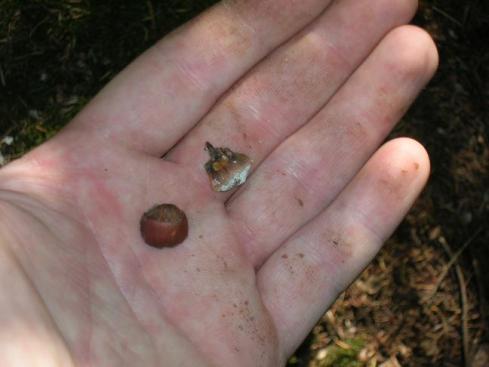
Plenty of pine cone parts and hazel nut shells around the burrow
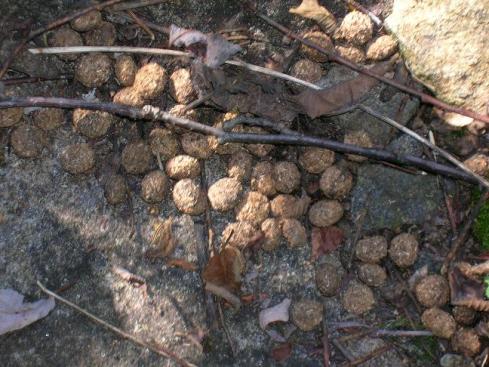
A whole bunch of scat on a rock. Probably either cottontail rabbit or snowshoe hare; they both frequent this neck of the woods. I took a few pieces for making pitch glue (more on that later). However...
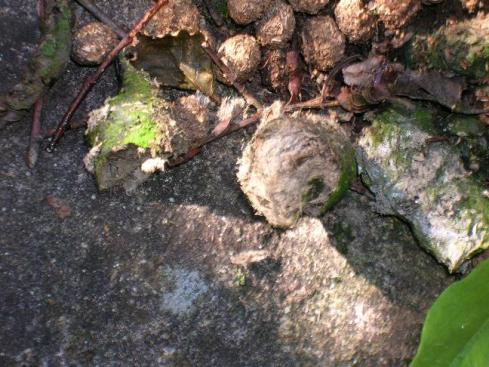
... Right next to the rabbit/hare scat were some pellets from a raptor. Predatory birds often eat small creatures whole and cough up the hair and bones later.

If you are looking for shelter there were plenty of raw materials, but if you are lucky you can find it ready made:
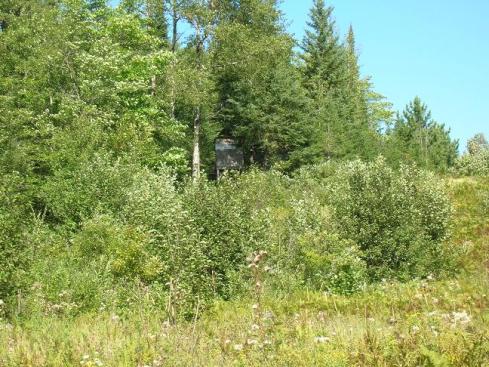
Deer hunting is practically a religion in Minnesota and there are stands scattered all over public land. They can be a ready made shelter, but it is best to leave them alone unless you are in dire need. (you wouldn't like someone going in your tent while you are on a day trip, would you?)

There were plenty of edible plants around too. I am sure that for every species I saw that I missed three more, but here are the ones I photographed:
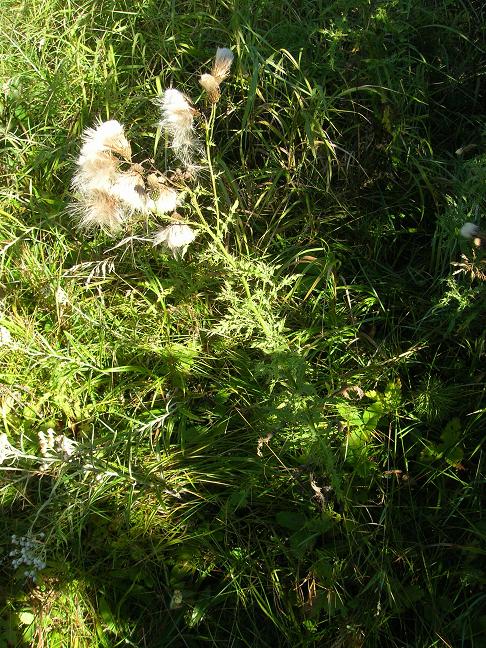
Thistle. Get past the spines and they are quite edible. This one might be a bit old for eating, but the down can be used for fire starting, and the Cherokee used it to fletch their blowgun darts.

Rose Hips. The outer pulp can be sucked off the seeds, and you can make a drink out of them too.
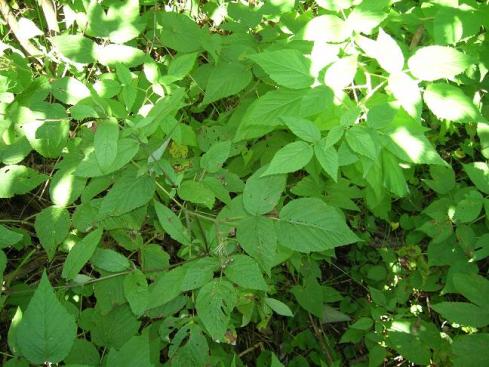
Raspberries. There were not any fruit left on them, but the leaves were used by the Ojibwe (and many other peoples) to make tea.
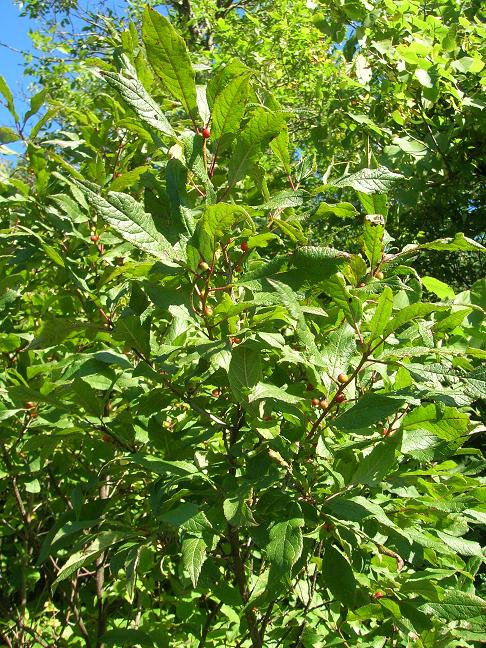
I think this is a pin cherry. I find wild cherries to be too bitter to eat straight, but they are supposed to be great for jelly.
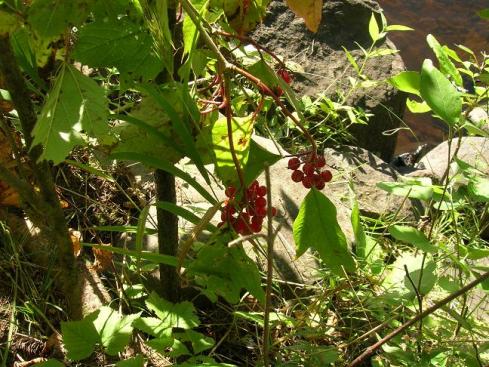
Highbush Cranberries. Often bitter, these ones were tart but still pretty good to eat.
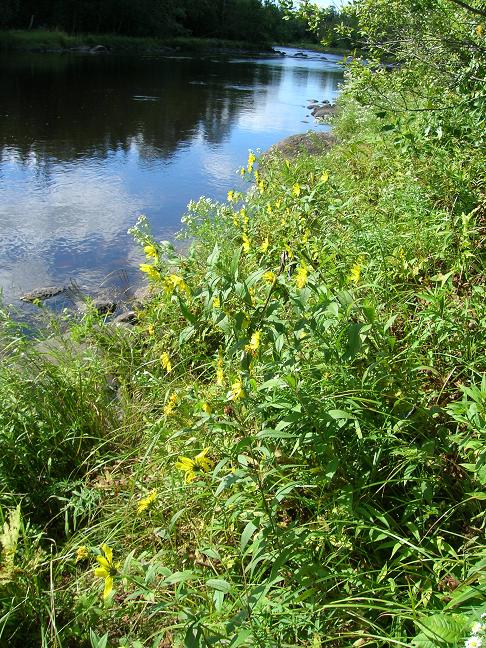
I am not positive, but I think that these are Jerusalem artichokes (the leaves looked too elongated to be common sunflower, but I don't really know). I pulled one up and the roots were only a couple inches long, but they are probably not done setting tubers yet.
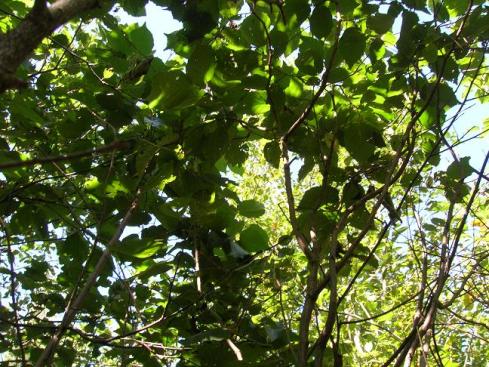
Beaked hazelnut. I didn't see any nuts on this one, but the squirrels can make short work of them. These are a major score if you need calories. The nuts are a pain to get to (green outer hulls covered with nettle-like hairs and a hard shell underneath), but they are packed with 60% fat and 25% protein.

Not a great shot, but beaked hazelnut bark. The leaves look like those of alder or birch, but the lighter colored lines in the smooth grey bark run vertically, while lines in alder and birch bark run horizontally.

I also found a lot of things useful for their utility purposes:

Wood nettle. The leaves make a good broth (it serves as either tea or bouillon, depending on your needs), and can be cooked and eaten as a leaf vegetable when young. It also makes great cordage, which is what I used it for today.
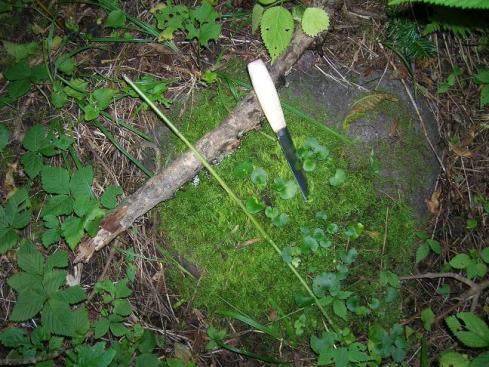
A nettle stalk stripped and ready to process. You will get stung handling nettles, but if you use only your finger tips it is not so bad. I had a picture of the next step, which is beating the stalk to remove the stingers and crush up the pith, but I seem to have deleted it by accident. You can also see that I have added a Mora knife to my rig. (note: the moss the knife is on could be used as a wound compress or sponge)
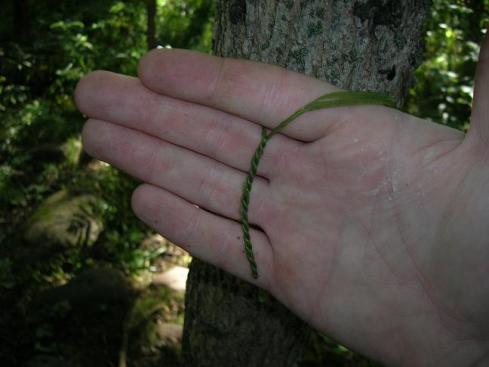
After beating and scraping out the pith, you use the basic reverse wrap to make a cord. The Ojibwe used to nettle cordage to make fishing nets, among other things (I can only imagine how long that must have taken). IA Woodsman has a good video on preparing nettle cordage (the link is below). I took some stalks home to clean and dry; I have heard the cordage is better if you dry and re-soak the fibers.

 IA Woodman’s Video
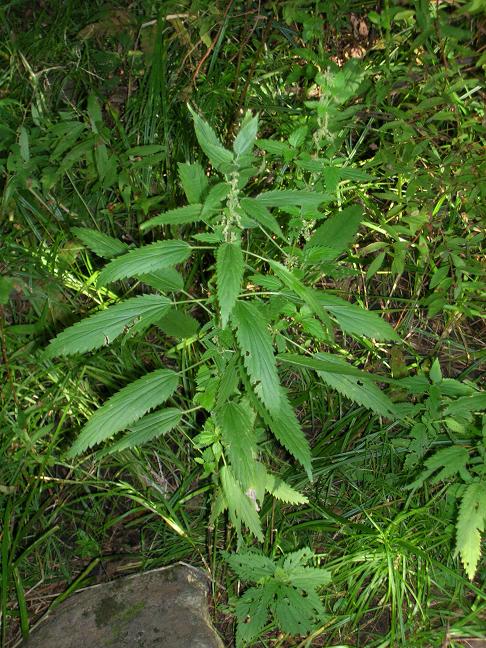
Slender Nettle (similar to stinging nettle but with more slender leaves). Different subspecies, same uses.
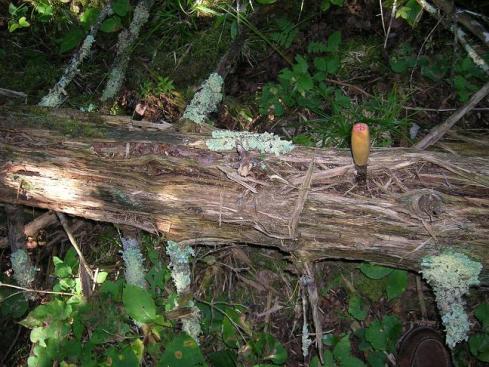
An old fallen spruce can be a good source for pitch wood (also called fatwood), which is full of resin and will burn in all conditions.
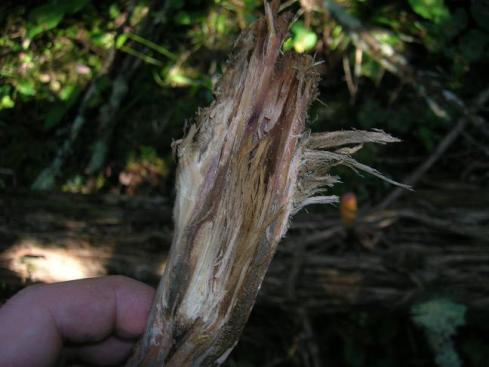
Here is a knot from the old spruce which has been cut open. the reddish areas at the top are full of resin. Old conifer stumps are also a good source of pitch wood.
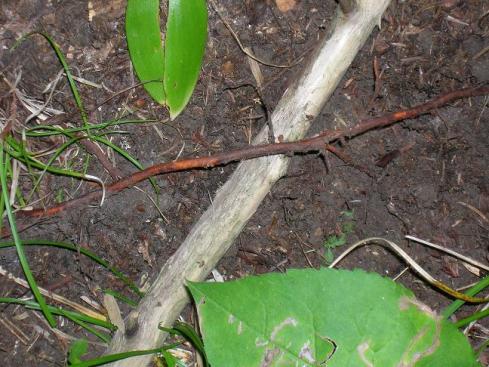
Spruce root, also called watap; the mending wire of the woods. By digging gently around the base of conifers you can find plenty of small roots which pull up quite easily.
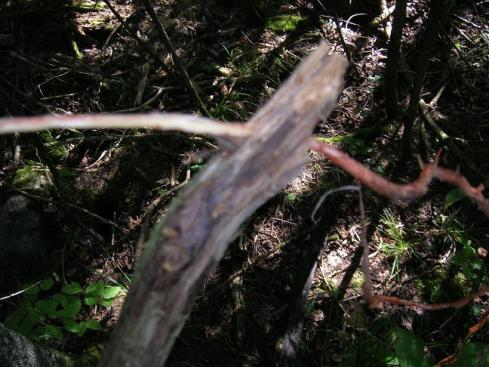
A blurry picture, but running the root through the split end of a stick will help remove the bark.
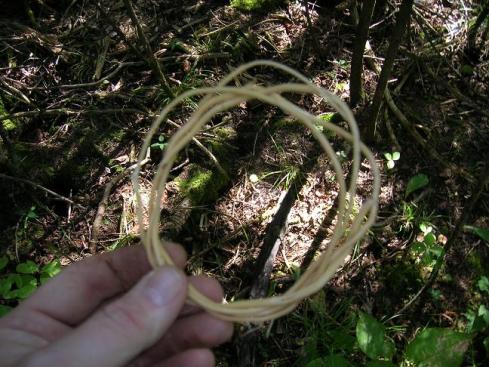
The peeled roots coiled and ready for use. If they dry out be sure to soak them to make them pliable again. The most famous use of watap is in the making of birch bark canoes as the split roots were used to sew the birch bark together. I tried to use this as a bow drill cord, but it was too short and I ended up breaking it because it was too tight; live and learn.
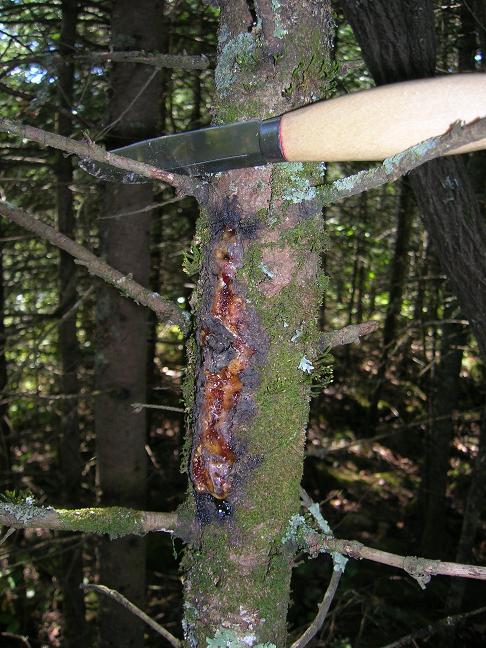
Healed wounds on conifers are great sources of pitch. I have burned pitch before, but I had never made pitch glue so I gathered a bunch of hardened sap to take home. (note: if you use your knife to pry pitch off of trees, you will spend a long time cleaning the blade later).

Back at home I ground up 5 parts hardened sap, 1 part charcoal, and 1 part rabbit scat (remember the scat? rabbit and hare scat is more like compressed sawdust than anything else).
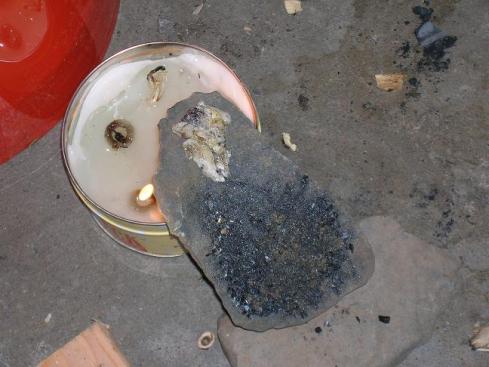
My pitch making rig. It is just a flat stone angled to drip down and melt the sap. It was too windy for a fire in my yard so I used a five wick survival candle.
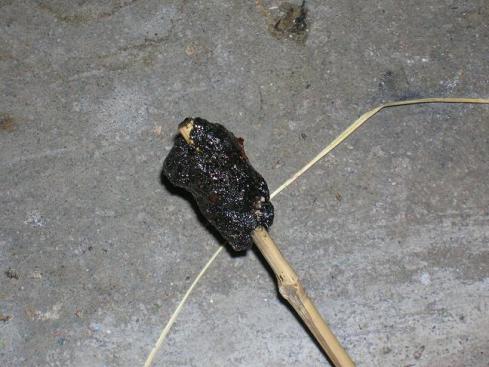
My not-so-pretty pitch stick. I don't think I got enough heat from the candle, and the sap didn't drip down as planned. I ended up mixing everything on the sap end of the rock with the charcoal and fiber, and so it is full of impurities. It hardened up well and it might still be functunional; if nothing else it will burn like a volcano.

My not-so-pretty pitch stick. I don't think I got enough heat from the candle, and the sap didn't drip down as planned. I ended up mixing everything on the sap end of the rock with the charcoal and fiber, and so it is full of impurities. It hardened up well and it might still be functional; if nothing else it will burn like a volcano.

Here is a good resource for learning to make pitch glue.
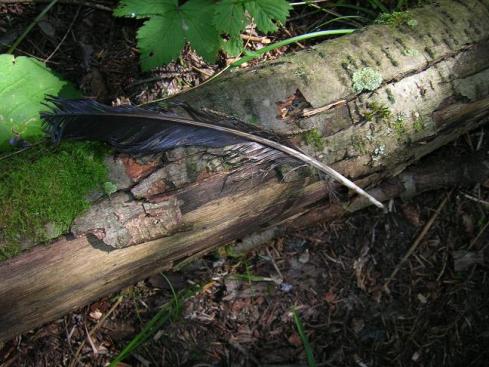
A feather I found on a game trail. Useful as fletching for an arrow (for people skilled enough to make bows and arrows), making field expedient fishing flies, and writing the Declaration of Independence. You are limited only by your imagination.
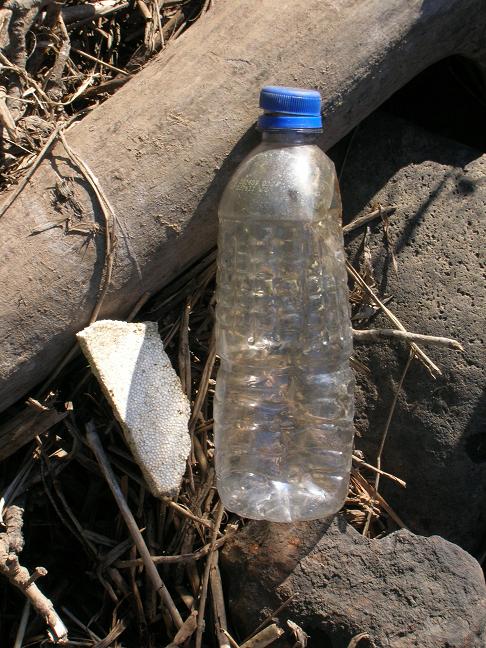
Human garbage. It's hard to go anywhere and not find it. However, it can be a life saver in a pinch. The plastic bottle would make a great canteen, and the foam could make a bobber for fishing.

An old beer bottle. Can hold (and potentially boil) water or could be broken or knapped for a sharp edge.

What all of this is meant to demonstrate is that the wild places of the earth are full of opportunities for the resourceful. If push came to shove I am not saying that you or I could live off only what we could hunt, fish, gather, and build. But if I die lost in the wilderness it won’t be for lack of trying.

And as a final note, I highly recommend Irish Setter 9″ Wingshooter boots. They are nice and soft now from my day of walkabout, and I walked through plenty of mud and standing water without a drop seeping in the boots.

“I’m going out with my boots on…”

The best meals are cooked on a fire. Period. End of story.

However, camping stoves are here to stay. I don’t use them because I believe that somehow they are more ethical than burning wood; you are just depleting resources from somewhere else instead (and most camp fuels are nonrenewable to boot). I use them because much of the BWCA is so scoured clean of dead, fallen wood that you would swear you were in a city park if not for the fact that you had to paddle a canoe to get there.

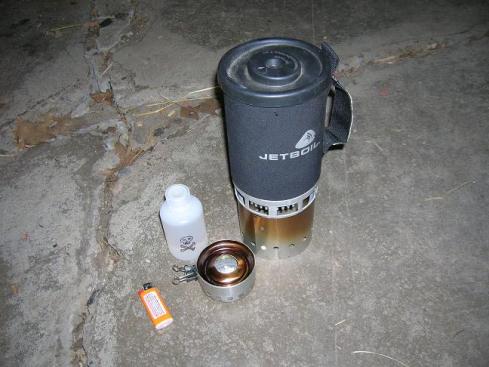
I still try to cook over a fire whenever possible, but if there is no good firewood to be found within a reasonable distance or there is a fire ban, I turn to the ol’ Jetboil. It is a great stove; everything packs up neatly in the pot, and its high efficiency nature means that you use less fuel.

However, isobutane canisters are a double edged sword. They are great in terms of being spill-proof and low maintenance (no pumping required), but they cannot be refilled (which is a pain when you are starting a trip and you have a bunch of almost empty canisters to use up) and more importantly, they are really expensive. Jetboil brand canisters can be 5 or 6 bucks for 100 grams of fuel. For longer trips I have been buying the larger Snow Peak and MSR canisters which give you 2 to 3 times the fuel for the same price (you just cannot fit them in the pot), but they are still expensive and bulky.

So I had an idea that you could rig the Jetboil pot to work in conjunction with an alcohol stove. I don’t have much experience with alcohol stoves (although I do have plenty of experience with alcohol), but I knocked up one fairly easily:

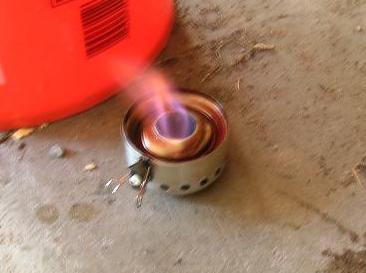
Alcohol stove running at full power

I apologize for the blurriness, but to see the flame I had to turn off the camera flash, and that makes it blurry for some reason. Anyway, it is a simple double walled chimney -type stove with a metal ring riveted to a binder clip for adjusting the heat output. The holes at the bottom suck air into the main chamber where it creates a hot flame. If you slide the ring over the intake holes it will reduce the air flow into the stove and make a smaller flame for simmering.

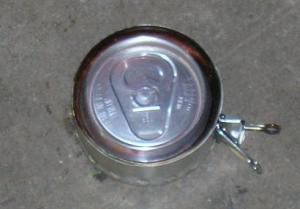
An unopened soda top makes a good snuffer for putting out the flame


I am not going to even try to explain how the stove is put together as I still have some bugs to work out. If you are interested in building a stove, check out the Zen Stoves website; it has everything you could want to know about alcohol stove design. This was just a testbed stove so the fuel chamber is too small to be truly functional, and the ring is hard to adjust when the stove is hot (aluminum expands when heated, who would have thought it?). I recommend you get your stove plans from someone who knows more than me.

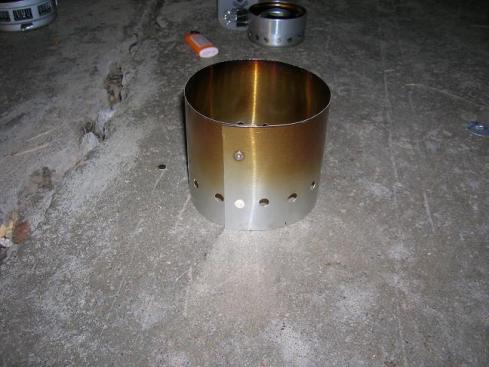
The Jetboil pot stand / windbreak

The pot stand for the Jetboil is pretty simple to make. It is just a piece of aluminum flashing that is riveted to make a ring, and punched with air intake holes at the bottom. What is nice about the Jetboil pot is that it is already built to sit on the ring that is built into the stove, so you just need to make the ring the same diameter as the original stove head:

The pot sits firmly on the ring. You can see the stove buring inside.

I would give you measurements, but the easiest way to build it is to wrap the flashing around the seat on the bottom of the pot, mark it and go from there. I used a cheap manual rivet tool (about $10 at Home Depot), but you could use bolts too. I am not sure if JB Weld would be a good idea; if it failed you could have boiling water everywhere. If I build another stand I would probably use a heavier gauge aluminum, or double up the flashing. It is pretty stable, but aluminum can get weird at higher temperatures.

What is also great is that the ring will fit perfectly inside the Jetboil for storage along with the stove and fuel bottle, and still have room to spare. Just try not to spill any alcohol inside the Jetboil; it will probably all evaporate if you do, but wood or denatured alcohol can blind or kill you, and if you spill moonshine that is alcohol abuse (what a waste of good whiskey).

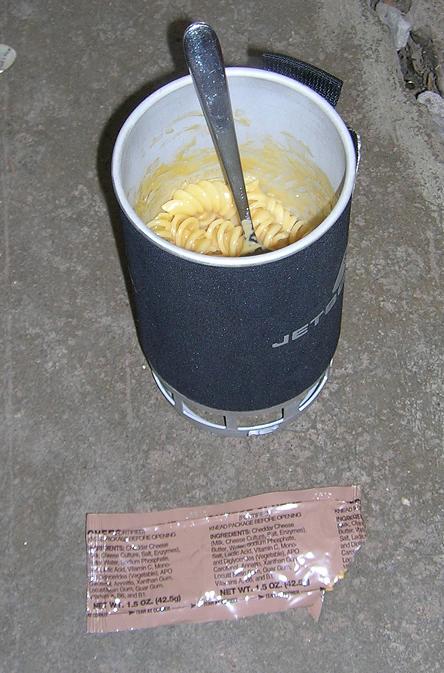
When testing the rig out, I made some macaroni and MRE cheese (you can never go wrong with mac and cheese). Here is the recipe:

  • 2 cups Water (just fill it to the line)
  • Salt (just a pinch)
  • about 1 cup of the Pasta of your choice
  • 1 Packet MRE Cheese Spread

Basically you make it the same way as Velveeta Shells and Cheese. Bring the water and salt to a boil, add the pasta, reduce the heat, cook for 8-10 minutes (stirring occasionally), drain (easy with the Jetboil), mix in the cheese, and serve. Add a wiener or a broiled and diced slice of SPAM (and maybe some ketchup as a garnish), or serve it beside a fresh caught trout or perch, and you are ready to do battle.

I don’t eat to many MREs (nothing against them, I am just cheap), but I do love MRE Squeeze Cheese and MRE Peanut Butter. Light, packed with energy, tasty, and I hear they make pretty good trap bait in a pinch. Squirrels love their peanut butter.

It's not pretty, but it will do...

Peace out.

I am a horrible blogger; it has been so long since I have blogged, that I had almost forgotten that I had a blog. <sigh> Oh well, there still seems to have been a lot of activity while I am gone. Specifically, the posts on hard cider and Polaris have been hopping – I guess that there are a lot of people who want to drink on the cheap and entire classes of sixth graders who are doing reports on constellations. Anyway, I digress…

I have been focusing my fishing ambitions this summer on improving my skills at tenkara, i.e. actually catching fish with it. Well, I have been quite successful in that endeavor, catching smallmouth bass, brook trout, and more suckers than you can shake a stick at.

My first brook trout caught with a tenkara rod. Only 9 inches, but that is big for the stream I was fishing.

It has been a fun rod to play with. It weighs next to nothing, so it is great to just throw into a pack for those outings that are not about fishing, but are close enough to water that having a rod close at hand could be useful. You might think that using a 12 foot rod in tight cover would be a hindrance, but I have actually found that it is easier to thread my flies through tough areas with the extra rod length; much easier than my 4’6″ spinning rod I had been using before I bought the tenkara rod. (That said, you still have to be aware of your surroundings whether using a Cuban yo-yo or a spey rod)

When you do hook a fish, it is a pretty awesome sensation as you can feel every move that the fish makes. In one way it is more simple to play a fish on a tenkara rod in that you don’t have to fumble with the line or reel, but it is more complex in that you have no backing in case the fish wants to run.

Playing a fish on a tenkara rod reminds me of when I studied aikido in college. I never was very good (only made blue belt), but I did learn a few tricks; I did throw a former Green Beret in the class a couple of times, but I think that is because he let me. He also gave me second favorite quote: “Pain is just fear leaving your body.” (My favorite quote is by Archilochus: “The fox knows many tricks; the hedgehog knows just one – one good one”)

Anyway, aikido is about redirecting your opponent’s energy rather than trying to go force-on-force with him or her. It is the same with tenkara – you use the fish’s energy against it; it will tire itself out quickly, you just need to control how that energy is expended by directing the fish toward the surface and side to side. If nothing else it makes fighting a small fish as much fun a fighting a big fish on sterner tackle.

Tenkara is also ideal for that most necessary of woodland fly casts, the bow and arrow cast. The bow and arrow cast, for those who do not know, is where you keep a short line and pull the fly end of the line back like shooting a slingshot to put a bend in the rod. When you let go the fly will (hopefully) shoot out towards where you were aiming the rod. Not making any sense? Check out my fancy diagram:

The springiness and length of the tenkara rod makes for some accurate bow and arrow casts. It won’t get you on a magazine cover, but it gets the job done.

Also important is that the telescoping nature of the rod and the lack of a reel mean that when you have to crawl through a tangle of alder to get to the next hole, you can turn a twelve foot rod into an 18″ rod in about 2 seconds. Try doing that with a two piece rod.

However, one of major issues with a stock tenkara rod is that the line is just loose when you collapse the rod. Without a reel there is nowhere to coil the line. Enterprising tenkara enthusiasts have a found way to overcome this issue by building line winders onto their rods. Here is mine:

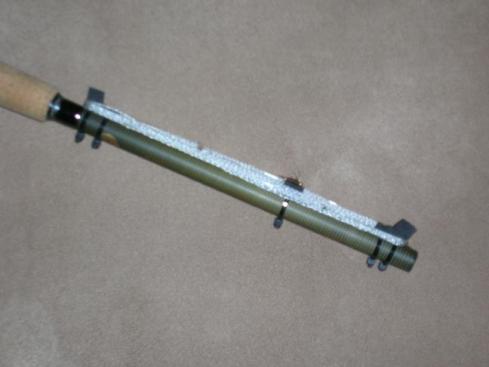
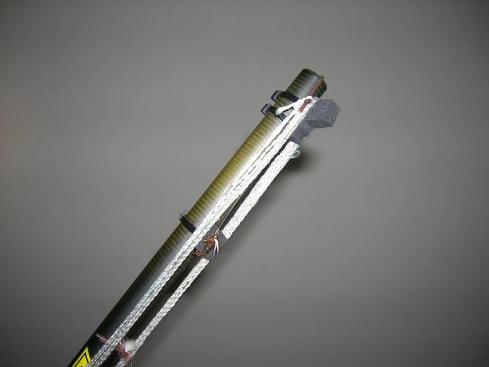
All I did was cut the pieces out of closed cell foam and attach them to the rod with cable ties. The center foam plug is used to hook the fly to and it’s cable tie is kept loose enough that you can adjust it. Simple but effective.

To sum it all up, I think I am a permanent tenkara convert. It is not a style for everyone, but it is catching on. It was almost unknown in this country until Tenkara USA started up just over two years ago, and now it is has become common enough that I am even finding tenkara tackle in a few brick-and-mortar shops now. It is a peaceful and poetic method of fishing. But, just to make sure that I don’t start getting arrogant in my ultralight fly fishing, I do keep a couple small bobbers, sinkers, and bait hooks in my fly box; it does make a dandy cane pole when you are to lazy to cast.

Summer is a really hard time to maintain a blog. It a season of doing, not of reflection. Unless, of course, you think snowmobiling is the meaning of life and you are lamenting how long it seems until winter. If you are one of those people, please keep it to yourself.

I figured I ought to at least check in since it seems that no matter how much I neglect this blog, people still keep reading (especially the blog about making hard cider in your closet; I don’t know what that says about you people, but I like it).

Here you can see what has occupied most of my free time up until now. The garden is coming along and I might even have something to harvest this fall. After fighting with that plastic mesh fencing for the last two years, it is really nice to have a permanent fence with a gate.

What I am most proud of, however, is that the potato tower appears to be working. The fence post next to it is five feet tall, so you can see how the potatoes have really shot up as I have been adding soil and boards. Buds are starting to form on the stalks and they should flower within the week.

As a parting note, I have invented a simple recipe for walleye (or any fish for that matter) that has been in the freezer for too long. I sometimes forget that I have fish in the freezer, and hate to just throw them out (if you are going to kill the buggers you should at least eat them), but they are past their prime when I find them (especially if they were caught through the ice and have not been cleaned yet). Here we go:

Pineapple Teriyaki Walleye

  • 2 lbs Walleye Fillets
  • 3/4 cup Teriyaki Sauce
  • An 8 oz can of Sliced Pineapple
  • Parsley to garnish

Mix the teriyaki sauce with the juice from the canned pineapple, and pour into a plastic bag. Add the fish and pineapple slices, and marinate overnight. When you are ready, broil the fish and pineapple on high heat for about 10 minutes per inch of thickness. Garnish with the parsley and consume.

Peace out!

I am leaving really early tomorrow morning for a canoe trip into the Boundary Waters. As I have discussed in a previous entry, I am the “Lord of the Pack” in that I do most of the planning, shopping, and packing of the food and gear (because I am damn good at it). However, I tend to get a bit of pre-trip paranoia and always feel like I am leaving something important behind.

That got me thinking, what do you really need to have a good time in the woods? There are five mission critical factors for it to be a truly successful trip:

1. Fire – I have camped without a fire when there have been burning bans in years past, but it always felt a bit hollow. As we have been gazing into campfires as a species for something like a million years now, it is pretty much hardwired into our system. While I pride myself in being able to build a fire without matches by using a bow drill, I always do bring a lighter (or three). It is way easier and still technically is building a fire without matches…

2. Toilet Paper – Just try wiping your ass with a spruce. Thimbleberry leaves and sphagnum moss make good field expedient solutions, but are no substitute for the real stuff. And as camp fare tends to be light on the fruit and vegetable sections of the food pyramid, bring two ply at the very least.

3. A Good Tarp – The weather forecast for this weekend is rain until the day we leave (go figure). Tents are great to sleep in, but huddle all day in one during a downpour and you might just give up camping. A good tarp allows you to be outside and comfortable without getting soaked, and will keep the rain and dew off of your gear at night. Don’t skimp on the tarp either; I started with a 9′ square tarp and now use a 16′ tarp as it will cover everything better with elbow room to spare. Bring a tarp.

4. A Folding Chair – Sitting on logs and in the mud looses its appeal very quickly. The seats that go right on the ground make it almost impossible to do anything productive and can be tough to get in and out of after a day of rough portages, and while the small folding stools like Byers of Maine makes are better, they are hard to sit on for too long and impossible to kick back in. What you want is a good, stable, four legged folding chair. They don’t weigh that much, are high enough to let you cook easily from, and you can sit in one all day and be comfortable.

5. Wine – The three liter box of wine is perhaps the greatest innovation of the last 50 years. Take the bladder out of the box and it will pack almost anywhere. Three liters is just about right for one person on a Friday to Sunday trip.

Perhaps some of you may think that I have omitted things that might have bearing on a person’s well being, like food. Be that as it may, when you are sitting your clean ass in a dry, tarp covered folding chair in front of a roaring fire while guzzling high wine like a voyageur, will you really care? If I get too hungry, I will just have a chance to use my survival kit.

I wonder what wine goes with squirrel?

All work and no play makes Seth a dull boy.

I am in my third week of excavating the garden, and I am beginning to feel like I am digging my own grave. I am a little over 2/3rds done with the digging, and could probably build a fence around the garden capable of withstanding a nuclear attack with the rock I have pulled out of the ground.

Time to go fishing!

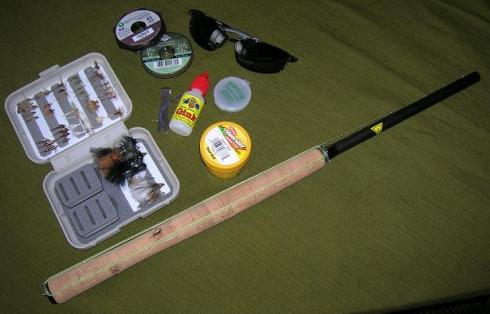
I finally bought a real tenkara rod – a 12′ Yamame 7:3. Since I hope to also pursue river smallmouth on the fly I opted for the stiffer rod to give me a bit more leverage if I hook a bigger fish. As I always attempt to be the Spartan minimalist, I have tried to keep my gear down to the bare essentials.

I have the rod, furled line, fly box with flies, two tippet spools (both about 4# test; fluorocarbon for subsurface and mono for dry flies), tungsten putty (for use as sinker material; it's way cheaper on eBay), floatant, line clippers, trout dough (I ain't proud), and polarized sunglasses; I am trying to avoid bulging vests. I don't have waders, but I wear waterproof sealskin socks with my canoeing boots since the only time I have been entering the water is to ford streams. And, of course, I carry the standard knife, compass, lighter, etc that I always carry when I am bushwhacking.

Before anyone thinks that I know what I am talking about I should point out that I have never caught a fish on a fly before. For me attempting to learn fly fishing is (as it probably is for most fly fishers) about trying to live a somewhat romantic ideal. While chucking chicken livers to catfish and Panther Martins to bass and pike is loads of fun (and does fulfill a Tom Sawyer sort of romantic ideal), the archetypal fisherman of lore is the crafty, experienced fly fisherman who stalks and presents his fly (most likely a dry-fly, and one he tied himself, of course) to wary trout in park-like spring creeks. After all, if it was only about getting fish, gill nets and m80s can do the job faster and easier.

Now don’t think that I am trying to become a tweed shrouded gentleman sipping single malt scotch while smoking a meerschaum pipe (I prefer bourbon to scotch when it comes to grain alcohol; I do have a meerschaum pipe, however). I love reading books by John Gierach; he is much more my ideal of The Fisherman. He seems just as happy catching bass on poppers as when he is catching trout on dry-flies. He believes in catch-and-release, but does not shy away from making an occasional meal of the fish he catches. In other words, he takes it all seriously, but not so seriously that he cannot have fun at the same time.

My first attempt at fly fishing happened abortively about three years ago. I liked the idea of fly fishing, and had received a 5 weight rod for my birthday, but I knew nothing about the mechanics of fly fishing. I practiced casting in the backyard and headed to a local stream that was supposed to have trout in it. After flailing away for a morning and not catching any fish I became discouraged and put the rod in the closet and forgot about it. I still liked the idea of fly fishing, but was overwhelmed by the complexity of everything – dries, nymphs, streamers, hatches, tippet sizes, line drag, roll casting, waders, reels, sinking line, an so on.

Last year I began trying to understand it all in earnest. I started by exploring a nearby stream without a rod. Slowly and carefully working my way down the stream, I was able to see a few trout in isolated pools (just because a pool looks like it should have fish does not mean that it does). Brook trout have amazing camouflage; you can stare at a pool that looks empty and suddenly as you focus they will come into view almost ethereally. I also began reading a lot. There is no substitute for experience, but at least through reading I have some idea of what I am trying to make my fly look like when I cast it (if nothing else I know more about the life cycle of a mayfly than I did before).

I became interested in the idea of tenkara after trying to lug my regular fly rod through the brush. The streams I have been scouting are small and brushy. There is little use for a 50′ cast on these streams, and trying to negotiate a strung up fly rod through the brush can lead to moments of insanity. With the tenkara rod I can reach out to around 20′ or so (if the wind isn’t against me) and can collapse the rod down to 20″ in a few seconds without having to unstring the rod. I did find that simply coiling the line in my hand while moving through the brush caused some nasty tangles so I took some advice from the Tenkara USA forum.

I was fishing a prince nymph as a dropper under an elk hare caddis, if you can see the two flies on the rod. My cousin swears by that fly arrangement.

If you can tell from the picture, I have put wire hooks that I can wrap the line around to keep from developing tangles. I just made mine from heavy wire; they work and don’t look half bad either.

I had some of my flies left over from my first attempt at fly fishing, got some more from Orvis (they periodically have a deal where you can get their 20 top flies for $9.95 with free shipping), but the rest came from the Great Lakes Fly Company here in Duluth. The owner, John, was extremely friendly and helpful, and I would highly recommend them. If I ever get into fly tying, I will definitely take their class (John’s flies are beautiful).

Despite all of my studying, I have not found the fish yet this year. I cruised some streams west of Duluth with my cousin last weekend, but they looked pretty silty for trout and had little cover besides. I went to the stream by my parent’s house this morning, but other than a few small fry I did not see any fish. It has been exceptionally dry here for the last few months (We had one large storm on Christmas last year, but have had very little precipitation since then) and spring came much earlier than normal. Last week was the stream opener, but as the snow has been melted for almost two months the water levels are very low and the water temperature is surprisingly warm for April. Hopefully the trout were just hiding from me, but we had a massive cold snap with little snow cover this winter which could have frozen some of the small pools all the way through.

I think next time I go fishing I will try the streams down closer to Lake Superior where the water should be higher (in theory). Plus in another month it will be bass season, and I know some good spots to find them. I would like to find some spawning beds for panfish that I can cast from shore for as well. I wonder how small pike would be on a tenkara rod? I doubt there are too many tenkara anglers looking for pike; I could start a trend (if I don’t break my rod first). I try to work under the mantra that my favorite fish is whatever one is currently biting my hook.

I am also thinking of making a short line for dapping small pools in heavy cover. I found this neat video of how to make furled leaders without tools, and I figure a five foot furled line with a couple of feet of tippet would be ideal for dapping. The 12′ rod should allow me to stand well back from the water and fish without the trout seeing me. Plus with the rod’s small diameter and the fact that I fish in forested terrain, they should be less apt to spook by seeing the rod. It is worth a shot anyway (especially in the thickest terrain where you cannot even bow-and-arrow cast).

Well, enough fun for now. I still have 12 more feet of garden to dig.